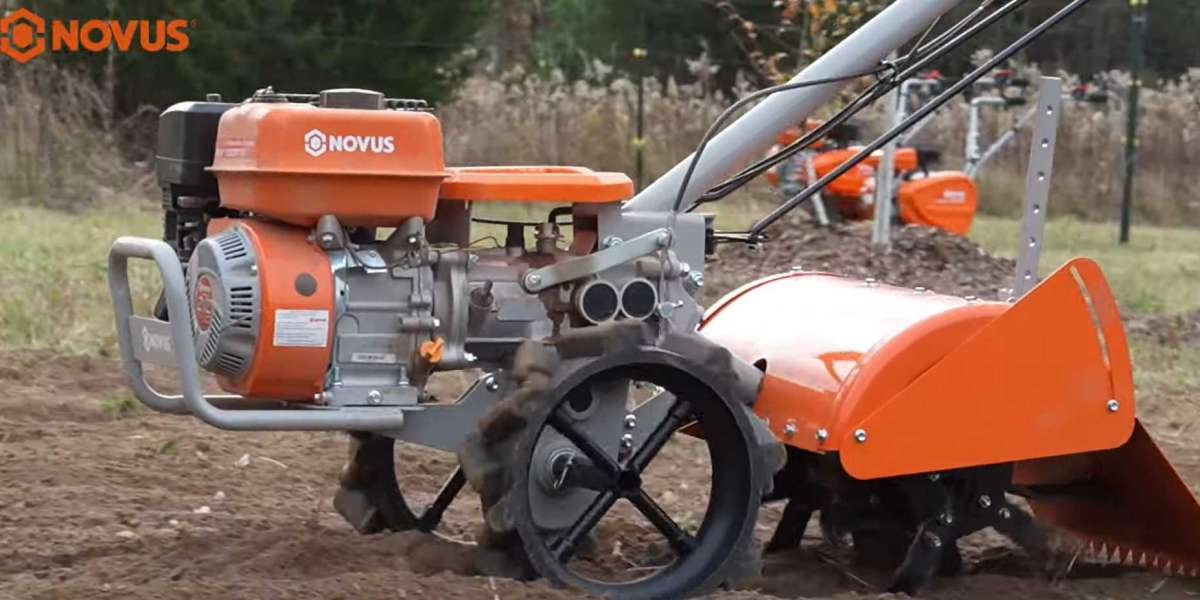
A rear tine tiller is an indispensable workhorse for gardeners, landscapers and small-scale farmers. It efficiently breaks up compacted soil, mixes fertilizer and prepares planting beds, saving massive time and physical labor during every growing season. However, working in tough soil, mud, rocks and debris puts constant wear on its engine, tines, belts and moving parts.
Without regular and proper maintenance, your rear tine tiller will gradually suffer from poor performance, frequent breakdowns and shortened service life, leading to unexpected repair costs and delays to your gardening plans. Simple daily, after-use and seasonal maintenance routines can greatly reduce wear, prevent common faults and keep the machine working reliably for many years.
In this guide, we share practical, easy-to-follow maintenance tips for rear tine tillers, covering post-use cleaning, routine inspections, lubrication, fluid checks, seasonal storage and part care. Follow these steps to protect your equipment and get the best return on your investment.
1. Thorough Cleaning After Every Use
Cleaning is the most basic yet vital maintenance step right after each operation. Soil, mud, grass clippings and small stones easily stick to tines, housings and gaps, which will harden over time, cause rust, block moving parts and even affect tilling efficiency.
Start by turning off the engine and waiting for all rotating parts to stop completely. Use a stiff brush to sweep away loose dirt and debris from the tines, frame, wheels and engine surface. For caked mud, gently rinse with low-pressure water. Never use high-pressure water to flush the engine, air filter or electrical components, as water ingress will cause engine failure.
After rinsing, wipe the whole machine dry with a cloth. Pay special attention to the area around tines and transmission parts. Removing dirt timely prevents corrosion and keeps all mechanical parts moving smoothly.
2. Regular Inspection of Tines Related Parts
The tines are the core working component of a rear tine tiller and endure the heaviest abrasion. Make a habit of checking them before and after use.
Look for bent, cracked, worn or missing tines immediately. Damaged tines will result in uneven tilling and put extra strain on the transmission system. Replace broken parts in time to avoid further damage. Also check bolts and nuts that fix the tines. Loose fasteners may cause parts to fall off during operation; tighten them up if you find any looseness.
In addition, inspect drive belts, chains and gears. Look for signs of wear, cracks or slackness. A worn belt will slip and lose power, while a loose chain will affect transmission stability. Replace or adjust these components at the first sign of damage.
3. Check Engine Oil Fuel System
Proper fluid maintenance is key to protecting the tiller’s engine, especially for gas-powered rear tine tillers.
3.1 Engine Oil Check Replacement
Check the oil level before each use. Low oil will lead to severe friction inside the engine and cause permanent burnout. Follow the user manual to add oil to the standard level. Change the engine oil regularly according to the recommended cycle. Old, dirty oil loses lubricating ability and cannot cool the engine effectively. Always use the oil type specified by the manufacturer.
3.2 Fuel System Care
Use clean, fresh gasoline. Stale fuel left in the tank for months will deteriorate, clog the carburetor and make the tiller hard to start. If the machine will be idle for a long time, drain remaining fuel or add fuel stabilizer. Keep the fuel tank cap sealed tightly to prevent dust and water from entering. Regularly clean the fuel filter to ensure smooth fuel delivery.
4. Air Filter Maintenance
A clean air filter guarantees sufficient air intake for combustion, enabling the engine to run powerfully and fuel efficiently. Working in dusty farm and garden areas, the air filter gets dirty quickly.
Check the air filter every few uses. For foam filters, take it out, wash with mild detergent and water, squeeze dry and apply a small amount of engine oil before reinstalling. For paper filters, gently brush off surface dust; replace it directly if it is severely clogged or damaged. A blocked air filter will cause weak power, increased fuel consumption and even engine overheating.
5. Lubricate Moving Components Regularly
Multiple rotating and moving joints need proper lubrication to reduce friction and wear. Focus on wheel axles, tine shafts, pivot points and control cables.
Apply high-quality lubricating grease or oil to these parts on a monthly basis or after heavy-duty work. Lubrication prevents metal-on-metal friction, rust and stuck parts. Well-lubricated components operate more flexibly, reduce engine load and extend the overall service life of the tiller. Do not over-apply lubricant, or it will easily stick to dust and dirt.
6. Spark Plug Inspection Replacement
The spark plug controls ignition and directly affects startup performance and engine operation. Remove and inspect the spark plug periodically.
If you find carbon deposits, clean the electrode with a wire brush. Check the electrode gap and adjust it to the standard range. Replace the spark plug once it is worn, corroded or cannot work normally. A faulty spark plug leads to difficult starting, unstable idling and insufficient power. Replacing it regularly is a low-cost way to keep the engine in good condition.
7. Seasonal Storage Maintenance
When the growing season ends and the rear tine tiller will be stored for weeks or months, special seasonal maintenance is necessary.
First, complete a full deep cleaning and dry every part thoroughly to avoid rust during storage. Drain all gasoline from the tank and carburetor. Change the engine oil to prevent old oil from corroding the engine interior. Remove the battery if equipped and store it in a cool dry place.
Store the tiller in a dry, ventilated indoor warehouse or shed, away from rain, moisture and direct sunlight. You can also cover it with a waterproof protective cover. Before reusing after long storage, perform a full inspection of fluids, filters and parts again.
8. Follow Correct Operating Habits
Good operating habits also reduce unnecessary wear and tear. Do not overload the tiller or force it into extremely hard, rocky soil. When encountering obstacles, stop the machine immediately instead of pushing forward forcibly. Let the engine warm up for a short time before formal tilling, and avoid long-time high-load continuous work. Standard operation can effectively slow down component aging.
Conclusion
A rear tine tiller is a long-term investment for gardening and farming. Simple, regular maintenance does not take much time, but it can effectively avoid sudden failures, cut repair costs and maximize the equipment’s service life.
From post-use cleaning, daily inspection, fluid and filter care to lubrication and seasonal storage, every small maintenance step matters. By sticking to these practical tips, your rear tine tiller will always maintain stable performance, serving you well for many planting seasons to come.
FAQ
Q1: How often should I clean my rear tine tiller? A1: Clean the entire machine thoroughly right after every use. Do a deep cleaning before long-term storage.
Q2: What happens if I ignore air filter maintenance? A2: A clogged air filter reduces engine power, increases fuel use, and may cause engine overheating and permanent damage.
Q3: Do I need to drain fuel before storing the tiller for winter? A3: Yes. Stale gasoline will clog the carburetor. Drain the fuel or add fuel stabilizer for long-time storage.
Q4: How to deal with bent tines on a rear tine tiller? A4: Slightly bent tines should be adjusted back to normal shape. Replace severely bent or cracked tines immediately to protect the transmission system.